
Exporting Emails
Download the entrants collected from any promotion as a CSV, straight from the Emails dashboard. Select everyone at once or pick individual rows before you export.
Selecting Entrants
Every row in the table has a checkbox. Tick the checkbox in the header to select every entrant on the page, or tick individual rows to build a custom selection:
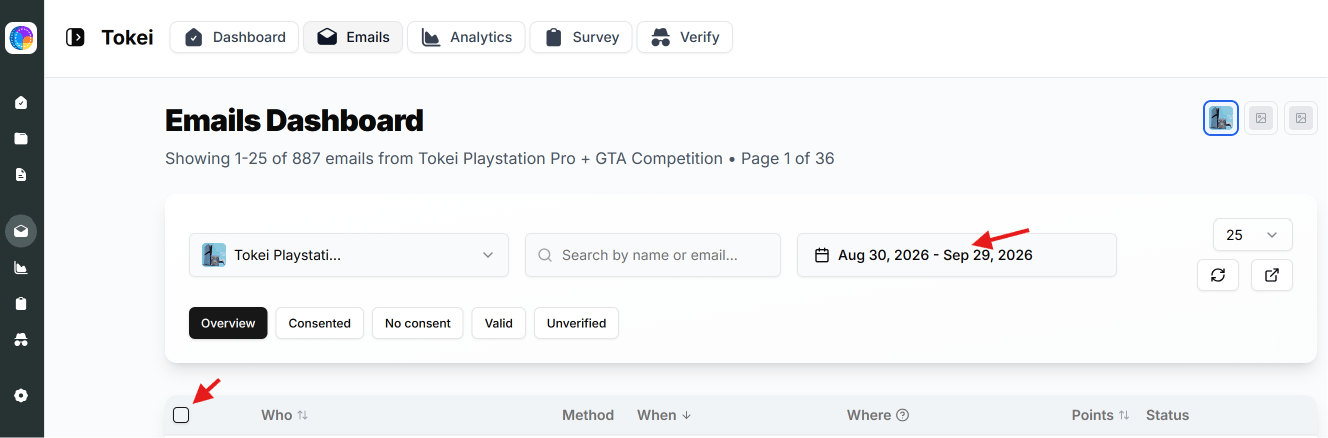
Click the checkbox in the top-left of the table to select every row currently on the page.
Once a page is selected, you'll be offered the option to extend the selection to every entrant across all pages, not just the one you're viewing.
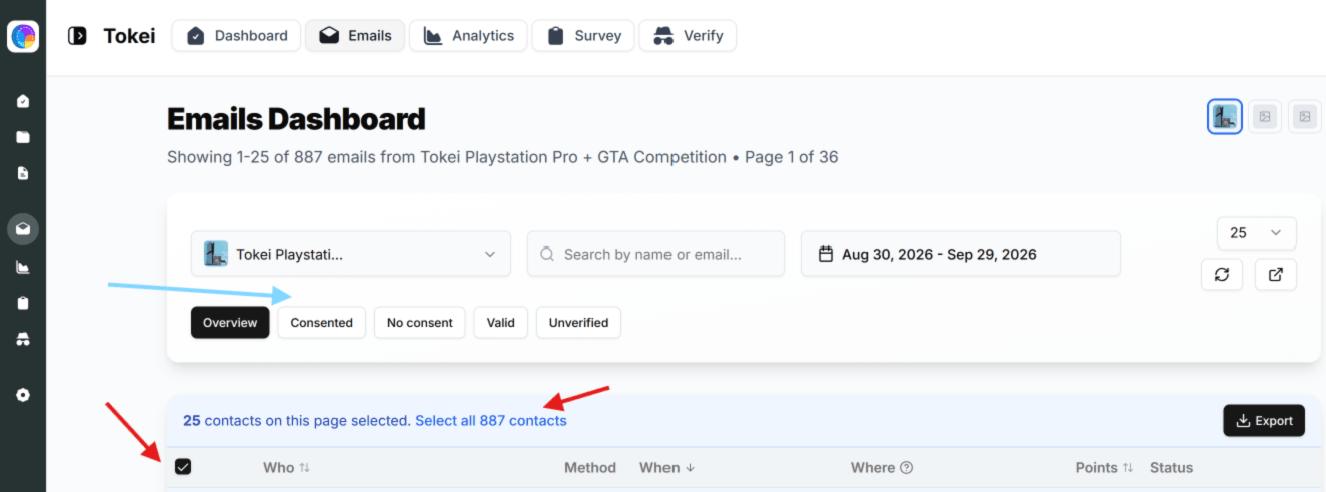
Prefer to narrow things down? Untick the header box and select only the individual rows you want to export.
Filtering Before You Export
Narrow the table before selecting rows so your export only contains the entrants you actually want:
- Filter by promotion, and by a custom date range
- Search by name or email
- Filter by consent status — Consented or No consent
- Filter by email status — Valid or Unverified
Exporting the CSV
With your rows selected, the export bar confirms how many entrants are about to be downloaded:
Click Export to open the confirmation dialog, which shows the exact count of contacts you're about to download.
Confirm to download a CSV of the selected entrants, ready to import into your email platform or spreadsheet of choice.
Note: If an entrant has consent selected, only contact them directly if their marketing consent was granted. Entrants marked No consent should not be added to marketing sends.
Mailchimp
Sync entrants automatically instead of exporting manually.
Full documentation index: tokei.io/llms.txt